the following images show my sketch work of assets that will be going into my finished envinronment. the images explain where they will be placed, what they look like and how main polys i will use to create them.


 |
| this texture will be using in the great hall area of my environment |
 |
| these textures will be seen in the corridor on the environment. |
these two images are the texture sheet that i created by using free texture images and placing them on to a 1024 by 1024 grid. each image snaps in place to the grid with as been made to be by the power of two. this is so that the modular pieces will snap and connect to each other easly. The grid units have have been created to coraspond to the units in UDK.
 |
| this image shows the modular piece that i create using the texture sheets. |
the image to the right shows the modular pieces that i have created in 3ds max using the texture sheet to create them. i started by creating a plain the same size of my texture sheets 1024 by 1024 with 16 by 16 segments. I then select the polys that make up the texture aera that i wanted to work on and remove, add, extrude, inset and so on untill i get what i want. I then unwraped the new polys that i created and made sure all the polys where textured correctly.
after creating the secments i decided to create a quick mock up on the corridor and great hall using the modular pieces. The images below show the result of this exspriment.
 |
| Render 1 of the great hall and corridor walls |
 |
| Render 2 showing a quick mock up of the floor (this texture will not be used in final creation) |
 |
| Render 3 of the corridor and the door way to the great hall. |
 |
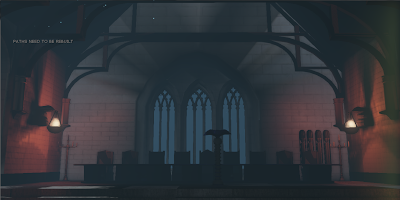
| screen shot of the great hall the room is empty, as im going to build the rooms before i start building the assets. |
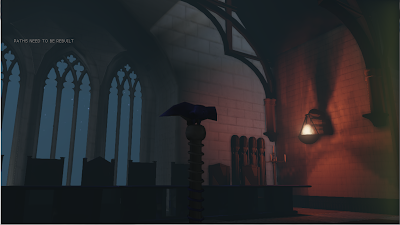
The image shown to the left is a screen shot of the great hall built in modular piece. The walls are made of a limestone like bricks. the pillar's shown where the wall goes out to the windows are also made from a the same limestone texture. Although I will be creating the rooms before the assets however to get a better look at the lighting I made the large fireplace seen in the image below.

 The ligth in the firplace will flicker to make the fire look a little more realistic. The light was made to flicker using a matinee in kismet. I made the fire flicker by changing the brightness using keyframes in the matinee menu. This can be seen in the image above.
 |
| This image shows the temporary ceiling that i have put in place the large arch way in this image is also temporary. |
The image to the left is of the corridor. This from is going to be long and thin, however at the minute the room looks a little too thin and might need to be made bigger. This room is just a test to see how I want to build the room which is why the texture is the same as the one seen on the great hall walls. the ceiling in the images to the left and below are just temporary and will be replaced with a more detaiuled valted ceiling.
 |
| This image shown a screen shot of the corridor |
This is what the hallway looks like in UDK, as stated earlier it looks too thin. To make the room bigger I will add another row of floor planels. The corridor will connect the three other rooms that I will be creating.
 |
| The ceiling in this image is made up of four modular pieces. |
The image above is of a vaulted ceiling which has been created using the same technique as the modular road tutorial, that was mentioned earlier in this blog. The ceiling will be used in the entrants room and the corridor.

The image to the left shows the great hall doors leading into the corridor. the doors will always be open and are static and a player start point has been placed in near the great hall entrants. The player start point is temporary and will be moved when that environment is complete.

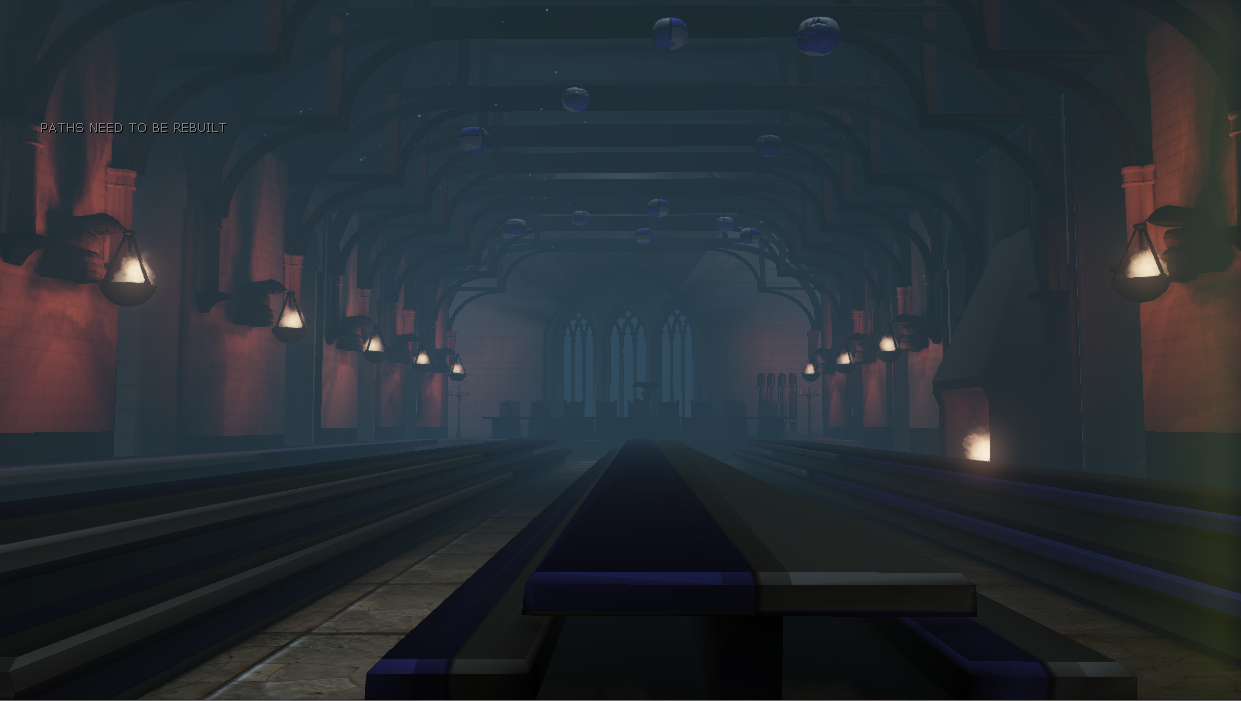
The textureing the corridor has been changed and looks a little more dull. however it now looks different from the textures in the great hall. There is still areas that need editing, such as the texture on the wall pillars and the back wall with the arch way needs to be made seamless. Flickering lights from torches still need to be placed next to the great hall doors.

As shown in the image above the wall textures need some more work done as well for example the windows still need an opacity map placed onto them and all so normal maps placed onto them aswell. also the window texture and wall texture need to be changed so that they match up into a seamless texture.
 As the ceiling beams didn't look like the ones seen in the harry potter movies a decided to remodel them and add small pilars and a stand to the bottom of them as well which makes them look better and more like the ones seen within the movie. I will be creating the four house torches but for now I will be using the snake torch to demonstarte where the torches will be placed.
 The windows shown in this image have not been made as well as they could so I remodelled them to look bigger and better more like the movie.
 This image shows the window that is at the back of the room and also shows the teaches table, dumbeldores stand, the house counters and floating pumpkins, these assets need texturing and the back window doesn't look right therefore i will be remodelling it.
 after importing the models show in the image above i added in the student tables without a texture. The back window has been remodeled and textured and looks a lot better however the lightmaps for this assets need to be rebuilt as the light is hitting the model right, this needs to be fixed and I will make sure to create the lights and check that all the maps created are corret.
 The side windows have been made bigger and look more like the windows seen with in the film and all add to the lenth of the room as well. I have created an oppasicity map to make the glass on the windows clear so that light from out side the environment will shine thougth which makes the room a little brighter.
This is the final model of the back window which looks a lot better then the one created first as there is more geometory added, and it looks more like the one seen within the film. if i where to redo this model i would make sure that geometery of it was more correct and would make the texture better for it.
The ligth maps still need to be edited for this assets as the outside lighting is showing though on to the assets, which is not wanted. I have tryed creating light maps both in UDK and 3Ds Max. when this didn't work I made sure that their where no overlapping verts before reimporting the mesh to UDK.
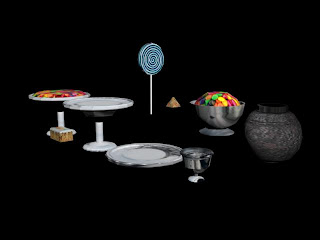
 for the fire place seen in the great hall i created a particle. effect be following a tutorial the image to the left shows that I have placed a texture onto the student tables and also added plates and sweets to the table which is what is seen in the great hall at halloween.
 The image to the right shows the great hall with all of the tables filled with sweets which are all textured. I have added a texture to the floating pumpkins and added drapes that hang from the ceiling. The image also shows that the ceiling beams have been moved so that they connect with the house torches. I don't like the texture on the drapes at the moment and will change it so that the drapes show the four house of hogwarts.
 Moving on to the corridor I have added four torches placed on ever side of the doors that lead to the geart hall and dumbeldores study. I have also added benches into this room as well. both the torch and benches need textures, but look fine where they are.

The image to the right shows models that will be placed in the great hall of my level in UDK. In the image is a pumkin, the house counter, the teachers table/chair and dumbeldores stand. The image is a screen show take in 3DS Max and shows the polys for each asset.
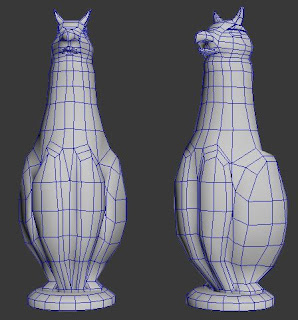
This image will be placed at the top of the spiral staircase that leads to dumbeldores study. I still need to change the geometery of the model to make it look more like the statue in the film, I also need to add wings to the model as well.
 For the great hall table assets i tryed to keep them as low poly as posible as there will be a lot of these assets used within the level. these assets are showen in the above image.
In the enterents hall the student leave there lugage have when they first arrive, which is why I decided to create old fashioned travel trunks and owl cages to place in this room. I will create a couple of different textures for each trunk so they don't all look the same. these will also be placed in dumbeldores study.
 The travel trunks still need textures and unwrapping and have just been lpaced into the level to show where they will be placed and to make show that they are to scale.
 This asset is dumbeldore study desk and has had normals baked onto it using a high poly model in 3DS Max. the image to the left is of the high poly model.


 after importing the models show in the image above i added in the student tables without a texture. The back window has been remodeled and textured and looks a lot better however the lightmaps for this assets need to be rebuilt as the light is hitting the model right, this needs to be fixed and I will make sure to create the lights and check that all the maps created are corret.

This is the final model of the back window which looks a lot better then the one created first as there is more geometory added, and it looks more like the one seen within the film. if i where to redo this model i would make sure that geometery of it was more correct and would make the texture better for it.

The ligth maps still need to be edited for this assets as the outside lighting is showing though on to the assets, which is not wanted. I have tryed creating light maps both in UDK and 3Ds Max. when this didn't work I made sure that their where no overlapping verts before reimporting the mesh to UDK.


 Moving on to the corridor I have added four torches placed on ever side of the doors that lead to the geart hall and dumbeldores study. I have also added benches into this room as well. both the torch and benches need textures, but look fine where they are.

The image to the right shows models that will be placed in the great hall of my level in UDK. In the image is a pumkin, the house counter, the teachers table/chair and dumbeldores stand. The image is a screen show take in 3DS Max and shows the polys for each asset.
This image will be placed at the top of the spiral staircase that leads to dumbeldores study. I still need to change the geometery of the model to make it look more like the statue in the film, I also need to add wings to the model as well.


In the enterents hall the student leave there lugage have when they first arrive, which is why I decided to create old fashioned travel trunks and owl cages to place in this room. I will create a couple of different textures for each trunk so they don't all look the same. these will also be placed in dumbeldores study.


No comments:
Post a Comment